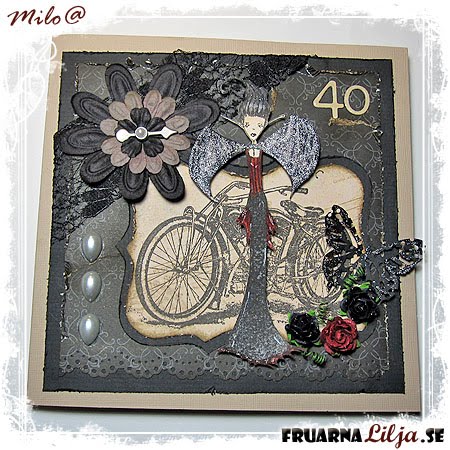
Sunday, August 15, 2010

Mushrooms

Made this card for the Sunday Postcard Art challenge with theme 'Mushrooms'.
Stamps I used are all Stampotique Originals:
hearts cubed - 3003
mushroom group - 3010
splatter long - 3014
mother teresa - 8855

Saturday, August 14, 2010

A good cup of Coffee will Sing to you!


I've never been a Coffee Drinker, never been able to tolerate the taste, no matter how much Cream or Sugar I added. It has always just tasted bitter to me. I do have to tell you though that there is NOTHING like the aroma of fresh coffee brewing! YUMMMMY!!!!!

I created this card for the Crazy 4 Challenges group that I am on. I used 2113 Musical Cup and 7137 Strung. For more details on how I made this card, please visit my blog

Enjoy your Saturday,

Vicki

Friday, August 13, 2010

Friday, August 6, 2010

Thursday, August 5, 2010

Bird in a Cage

I've made quite a plain and simple card this time using black embossing powder for the images and colouring them using Twinkling H2O's. I've used Distress Inks to colour the base card.


I have used the following stamps by Jo Capper-Sandon:
~{3002 Daisy Daisy}~
~{3011 Quiet Place}~
and this one by Janet Klein:
~{9215 Bird in a Cage}~

Kaz xx

Friday, July 30, 2010

Pink


Hugs from Milo

Thursday, July 29, 2010

CARROT

Although I am not an "official" member of the Stampotique design team since I moved to Kazakhstan I am still going to post occasionally.
So here is my latest offering

This is part of a journal page.......you can see the rest of it on my blog HERE
Stamps used are Carrot 6092 and Tall Word Collage 7167
Sue Roddis

Love Ya!


Join us over at the Stampotique Designer's Challenge this week for our Stampotique Only Sketch Challenge.  You must use your Stampotique stamps along with the sketch.

Check out this beauty that our design team member Betty Roberts created.  

What are you waiting for???  Get creating and jump on over to see what the sketch is here.  We can't wait to see what you create.

Friday, July 23, 2010

Birthday card

Many hugs from Milo

Friday, July 16, 2010

Monday, July 12, 2010

Alphabet swap

Made this card for an alphabet swap: the B from Bees.
I used the Jo Capper-Sandon stamps: medium bee - 3000, hexagon - 3006, big bee - 3008, french text - 3016.

Friday, July 9, 2010


A lot of fans were waiting for the new Twilight movie to come out. Although i really liked the books i dont care so much for the movies ( sorry) but i will still go to the theater with my teen daughter who is somewhat obsessed lol!
I had to make a little fun of her and made these cards.

For this card i gave Rocky ( item # 6032) a pair of fangs.


Of course real vampires sparkle!


Dont they look cute together?

Stamps used:

Rocky #6032
Prom Queen # 6051
Dweeze # 6102
door # 6095


Sunday, July 4, 2010

Shaving Foam Technique

Making backgrounds with shaving foam is real fun. For this technique you need (see photo 1): the cheapest shaving foam you can find, a deep tray, water based liquid paint or food colors, a stick or toothpick, a palette knife or an old credit card, cardstock (not glossy).

Spray the shaving foam into the tray and spread it with the palette knife to an even layer of about 1 inch (2.5 cm) thick (photo 2). Drop some paint on the surface of the foam (photo 3) and swirl the colors around with the stick (photo 4).

Place a sheet of cardstock on top of the shaving foam and press on it to make sure the sheet is touching the foam. Gently peel the cardstock off the foam and lay it on a flat, hard surface (photo 5). Remove the shaving foam from the cardstock with the palette knife (or credit card) and a paper towel. Let the cardstock dry (photo 6).
Place another sheet of cardstock on the shaving foam and repeat the steps.
After peeling the cardstock of the foam (photo 7) you can place another sheet of cardstock on this sheet so you use 'both sides' of the foam (photo 8).


With this technique you can make a lot of patterns by mixing the paint and foam in different ways.

Made this card with a shaving foam background.


Friday, July 2, 2010

Have a Star Spangled Day!

For any additional details please see my blog.

Card details:
Stamps: Simple Stars from Stampotique
Cardstock: Real Red, Brilliant Blue, Whisper White
Inks: Real Red, Brilliant Blue, Fresh Snow, Stazon Black
Accessories: Ultra, Crimson & Stardust Powdered Chalks, Buzz N Magic Paint, Earth Elements brads, ribbon unknown

Wednesday, June 30, 2010

Give The Dog a Bone

I've made this very quick and easy card for a family birthday using scraps of paper and ~{2204 Give The Dog A Bone}~ by Maryse Carrier.

I've coloured him with Copics and just added a bit of Glossy Accents for his nose. He's such a cute dog and very quick to colour too!

Kaz xx

Tuesday, June 22, 2010

A little bit of calm...


A different take on a tag, using Jasmin and Quiet place.

Saturday, June 19, 2010

Skinny Eric on a Skinni


I'd not heard of Skinni's before, but they are a bit like ATC's only they measure 3" x 5", and they are a challenge on a blog with the theme being 'blue and white'. I've been itching to use Eric as I really like him and he's the perfect size.


I've put him on a background created using Glimmer Mists and used 3014 Splatter Long to add a few more blobs.

As I think that Eric is probably loved by all of Daniel Torrente's girls, I've given him a couple of hearts from 3003 Heart Cube so he can give them out. I think he probably has more than one girl on the go at a time!

Kaz xx

Thursday, June 17, 2010

Simply Sweet


Sometimes it's fun to create simple cards...........no muss, no fuss, just simple. Sometimes I think that less says more. Ohhh I love to pull out my Designer Papers, Ribbons, Buttons and other embellies and just play, but sometimes I want something that's completely understated, the focus being the image and words.

That's what I did with this card. Did you know that you can use Copic Markers quite successfully on coloured Cardstock? You need to stick to the lighter colours obviously, but you can achieve some neat results. I like to work on Light Blue, Pink and Lighter shades of Yellow.

For this card, I stamped "Thinking Of You" a wonderful image by Maryse Carrier in Momento Black ink. I then coloured with Copics. One tip for using your Copics on the coloured cardstock and gettting somewhat of a decent blend is to go over the area that you want to colour with your colourless blender first. The Second tip is to work tone on tone...........for example, rather than colouring the chair in completely, I used two darker shades of yellow to add some shading.

One thing that you can do when working with coloured cardstock is to have a scrap handy to test the colours on. That way, as you add each colour, you can test to see if it will work or not. For instance, if you're colouring on light blue cardstock, you don't want to use yellow as it will take on a green tinge. Of course colours will also appear darker on the cardstock. The little dog is actually coloured in baby skin pink and shaded with a wee bit of sand as the browner shades took on a muddy tone. Lastly, use the natural colour of your cardstock to create Highlights. As you can see in the lampshade, I've left some yellow space. You can soften up the edges of these areas by softly stroking your colourless blender around the area.

To finish this simple card, I used the just sitting here thinking of you stamp from Carol's Collection.

Hope you all have a wonderful day


Vicki

Monday, June 14, 2010

Imagine...


Here I created a 4 x 4" card using:

Jasmin
Big Bee (wings)
Imagine Definition
Medium Bee

All by Stampotique Originals.

Coloured using Copic markers and edge distressed with white Gesso.

Thanks, Jo Capper-Sandon. x

Sunday, June 13, 2010

Magical Beauty


Those beautiful ladies are out basking in the sun again.... 
ahhhh, the lazy days of summer!

Stampotique images:

Please drop by my blog for more details.

Saturday, June 12, 2010

More From MaryAnne Walters!


We would like to share a wonderful video created by MaryAnne Walters highlighting her recent Stampotique creations.  Thank you for sharing the inspiring details of your creations, MaryAnne!

Check out Mary Anne's blog ScrappyStickyInkyMess
and leave her some love.

Thursday, June 10, 2010

Bookmark and Bag/Purse Charm

This is my first post as a member of the DT and I have chosen to start off with a bit of beading.

I've made a bookmark using 9112 En Dago en Maschera and 2051 Friendly Face as they fit perfectly into a 1.5 x 1.5in Memory Frame. One side has glass at the front and the other is finished with Glossy Accents and then I've added some beads and ribbon.


The second project again uses a 1.5 x 1.5in Memory Frame, but this time I've used 6051 Prom Queen and 6108 Karin. I've turned this one into a Bag Charm (UK) or a Purse Charm (USA).
I've added a split ring and a bit of chain and then attached lots of beads and a bit of ribbon.


Kaz xx

Saturday, June 5, 2010

Tray of Creativity


Today I thought I would share some fabulous artwork from MaryAnne.  She shared this with me a week or two ago and I was just blown away by the creativity of it and then to peruse her blog I found out she made this try from cardstock.  How cool is that????

Check out Mary Anne's blog ScrappyStickyInkyMess and leave her some love for her fabulous tray using Stampotique stamps.

Thursday, June 3, 2010

Miss you...


In this card I have used "2145p - Hello" and the text
"9010p - I miss you" and "7153p - Timeless"

For more cards and other handmade things, visit my blog.

Hugs Milo =)

....

Tuesday, June 1, 2010

Art by Carol


This adorable watercolored garden card was created by Carol and it's just too sweet not to share with everyone! I have a few containers labelled "not a clue" too!! LOL!